grooves n'stuff (page 2)
So it's worth thinking about modifying planes that are intended for bamboo use only and putting a groove into the soles, e.g. if you plan to build a big, two-handed rod for salmon or steelhead fishing some time in the future and you are unwilling to spend mucho dinero buying a custom made form for just a few rods you will probably make for yourself or friends using that specialty form.
As already mentioned, the main problem I encountered was to put in the groove without using any machinery. It is most important to produce a groove of uniform depth. At the first glance this seems to be simple, at the second glance a daunting task, but in the end it is in fact amazingly simple to do.
step 1:
Before you start putting the groove in, the block plane or scraper has to have a flat and even sole. This is extremely important, because it is impossible to get a high precision groove of uniform depth without it. The sole will act as a fence, so the surface of the groove will reflect the surface of the sole. So, take your time to do a good job.
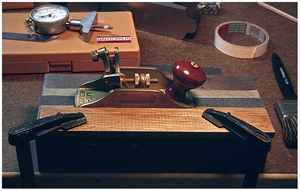
You need a few sheets of sandpaper of 180 grit. As a working surface I use a steel block of 260 x 110 x 65 mm with flat milled surfaces, a leftover from a former job of mine. Any really flat and reasonably hard surface should be usable to do the job, e.g. a plate of steel with a ground surface (e.g. a lapping plate), or a thick, evenly flat plate of glass or marble. To check the quality of your work you also need a beveled steel straightedge of about 100 mm in length or longer. These are available from machinery and tool supply stores. A beveled steel straightedge reveals flaws in the surface down to 1/100 of a mm just by carefully putting it's edge on top of the surface and checking against a light source. By the way, it is also the best tool for checking the flatness of bamboo nodes. It also mercilessly reveals the quality (alignment of the two halves) of your planing form.
Cut a few pieces of sandpaper that are large enough to move the plane upon back and forth and put them aside. Dismantle the plane. Remove all parts like the frog, plane iron, fasteners, screws, so the only part left over in your hand is the cast iron body of the plane. This way it is easier to remove the iron dust that likes to settle in the nooks and crannies while grinding.
Remove any dust from the working surface, put a sheet of sandpaper on it, cutting side up, put the plane onto it and move it back and forth in lengthwise direction. Apply medium pressure down to the center of the footprint of the plane. Excessive force is not necessary and tires you out a lot quicker. After about a dozen strokes back and forth, remove the plane, remove the dust from the sandpaper and the working surface, put the paper back in place and continue. Occasionally check the result with the beveled steel straightedge against a light source. If the sandpaper gets clogged, replace it with a new sheet.
If you like and your sandpaper you are using can withstand liquids, you can use a lubricant like a mixture of kerosene and a light machine oil. This makes the abrasive cut quicker, but it also makes a considerable mess. Decide for yourself. About every dozen strokes turn the plane for 180°, so the rear end goes to the front. This distributes uneven abrasion and helps to get a good result and uniform quality.


